Strawberry gluten free and keto pop tarts

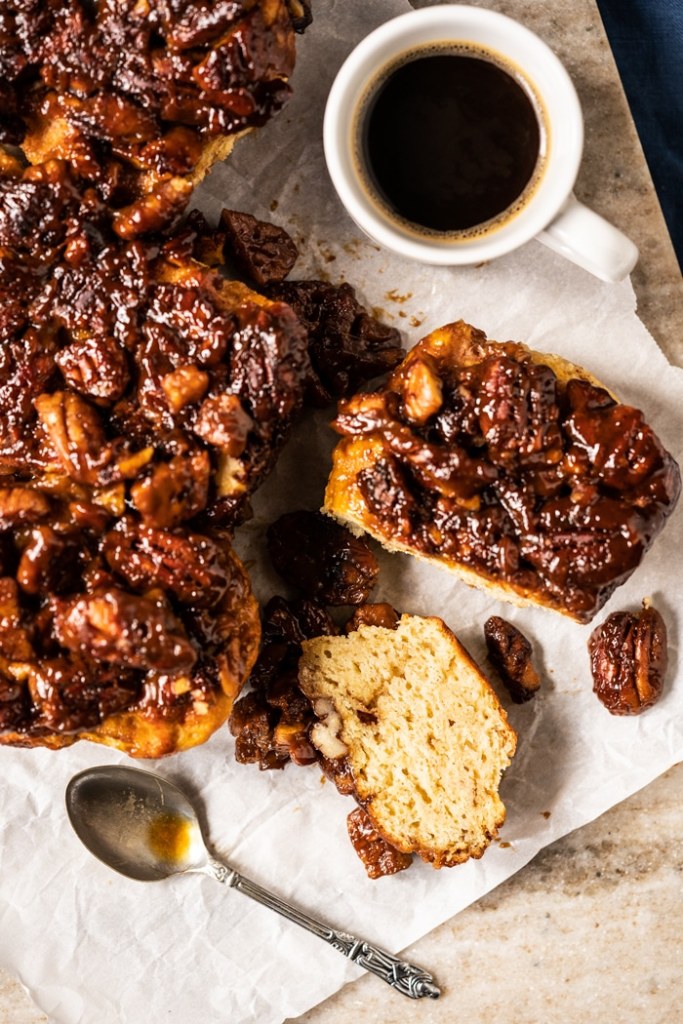
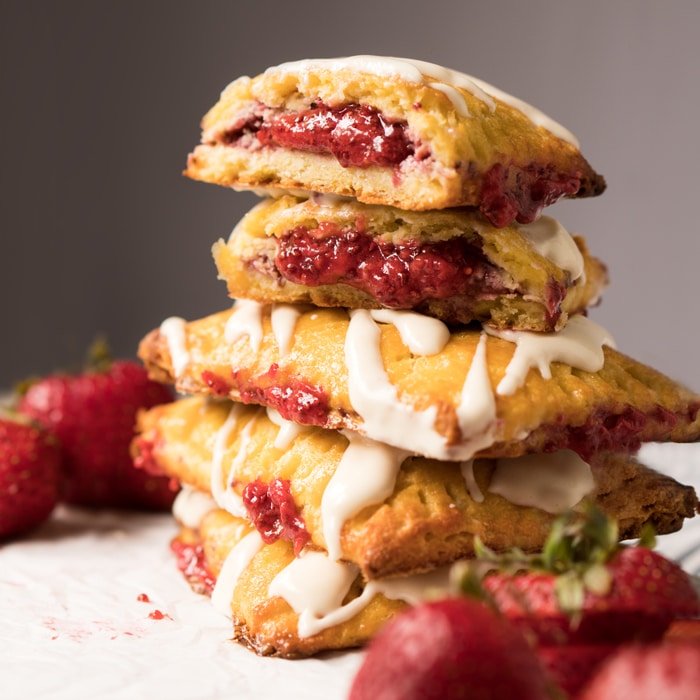
Strawberry Gluten Free & Keto Pop Tarts

  • Servings: 8 small pop tarts
  • Difficulty: easy
  • Print

Sooooo Good!


Ingredients

    For the strawberry filling
  • 1-1/2 cup strawberries fresh or frozen
  • 1/2 cup raspberries or more strawberries
  • 1-4 teaspoons erythritol xylitol or swerve to taste
  • 1 tablespoon lemon juice freshly squeezed
  • 2 tablesppons chia seeds or more as needed
  • For the pie crust
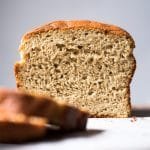
  • 1 batch best pie crust ever – see link below recipe with 1 teaspoon orange zest
  • 1 egg lightly beaten for egg wash
  • For the cheesecake glaze
  • 1/4 cup cream cheese softened
  • 2 tablespoons unsalted grass-fed butter
  • 2-4 tablespoons powdered erythritol xylitol or swerve to taste
  • 3/4 teaspoon vanilla extract
  • pinch kosher salt
  • heavy cream or almond milk as needed

Directions

    For the srawberry chia jam
  1. Cook your strawberries and raspberries in a saucepan over medium heat until they begin to break down, about 5 minutes.
  2. Stir in the lemon juice and sweetener of choice (to taste). Mash it down or leave it chunky. Cook for 5 more minutes, remove from heat and stir in the chia seeds. Let stand until it begins to thicken, adding water if needed to thin out until desired consistency is reached.
  3. Allow to cool to room temperature and store in an airtight container in the fridge for a week or two and in the freezer for up to three months.
  4. For the pie crust
  5. See link below
  6. Make a batch of our super flakey pie crist and chill while the strawberry jam is setting. I also highly suggest you add a teaspoon of orange zest to the crust.
  7. To assemble the pop tarts
  8. Preheat oven to 400F. Line a baking tray with a mat or parchment paper.
  9. Roll out pastry dough in between two sheets of parchment paper, lightly dusting with coconut flour as needed. Cut into desired size (I suggest making 8 pop tarts, as they’re very filling.)
  10. Brush edges with egg wash and spoon a couple tablespoons of the chilled chia jam. Press edges together and press down with a fork. If there are any cracks, simply pinch the dough together. As with regular pie crust, try to work quickly or put your dough back in the fridge for 15 minutes if it begins to warm up too much.
  11. Place pop tarts in prepared tray, cut a few slits on the top with a sharp knife, freeze for 15 minutes, brush with egg wash and bake for 20-30 minutes, until golden all over. Baking time can vary a lot from oven to oven so be sure to check in on them at minute 10. Allow to cool for 10 minutes before serving.
  12. Make the glaze while the pop tarts are cooking by creaming together with your mixer the cream cheese, butter and powdered sweetener until light and fluffy. Add in the vanilla extract, salt, and adjust texture to taste with a teaspoon of milk at a time. keep in mind that unless you add a lot of sweetener, your glaze won’t set completely.
  13. Store them unglazed in an airtight container, at room temperature for 2-3 days. Alternatively you can freeze them unbaked or baked for about a month.
Recipe Courtesy of gnom-gnom.com

Recipe for the best pie crust

gluten free and keto pecan sticky buns

Gluten Free & Keto Pecan Sticky Buns

  • Servings: 9
  • Difficulty: easy
  • Print

Fluffy, gooey, and ultra sticky and nothing short of dreamy!


Ingredients

    For the caramel-pecan topping
  • 1-1/2 cups pecans roughly chopped
  • 1 batch 15-minute keto caramel (see below)
  • For the gluten free & keto rolls
  • 1/4 cup sour cream or coconut cream + 2 teaspoons apple cider vinegar
  • 3 tablespoons water lukewarm between 105-110F
  • 1 tablespoon inulin or maple syrup, honey to fee the yeast
  • 1 tablespoon active dry yeast
  • pinch ground ginger optional (to help proof the yeast)
  • 2 1/4 cups almond flour
  • 6 tablespoons golden flaxseed meal or 5 tablespoons psyllium husk, finely ground
  • 5 tablespoons whey protein isolate
  • 4-6 tablespoons erytritol or allulose, to taste
  • 2 1/4 teaspoons xanthan gum
  • 2 1/4 teaspoons baking powder
  • 1 1/2 teaspoon kosher salt
  • 3 eggs room temperature
  • 1 1/2 tablespoon unsalted grass-fed butter or ghee/coconut oil, melted and cooled
  • 1 tablespoon apple cider vinegar
  • For the cinnamon filling
  • 3 tablespoons unsalted grass-fed butter softened
  • 4-6 tablespoons erythritol or allulose, to taste
  • 2 tablespoons ground cinnamon
  • For the Caramel
  • 1/4 cup grass-fed butter salted or unsalted
  • 1/4-1/2 cup alluose or xylitol
  • 1/2 cup heavy whipping cream
  • 1/4-3/4 teaspoon kosher salt to taste
  • 1 teaspoon blackstrap molasses optional

Directions

    For the Caramel
  1. Add butter to a small saucepan over medium/ow heat and simmer, stirring every so often, until fully browned (about 5 minutes). Add in the sweetener, heavy cream and salt stirring until fully combined. Add in the molasses and stir briefly until just combined.
  2. Simmer over very low heat for 15 minutes (don’t stir at all), taste for seasoning and pour into a glass container of choice. Your caramel should be sticky and thick, but still totally pourable. use warm or allow to cool completely, and can be refrigerated for up to a week.
  3. For the caramel-pecan topping
  4. Line with parchment paper the bottom of a 9×9 pan. Set aside. Prepare a work station for rolling up your buns by placing a 9×9 piece of cling film on the counter. Leave handy a small bowl with water (to wet your fingers) and a touch of oil to spread the dough (avocado works great here).
  5. Scatter pecans onto prepared pan. Pour caramel sauce on top of pecans. Set aside while you make the rolls.
  6. For the sticky buns.
  7. Mix sour cream, water and inulin (maple syrup) to feed the yeast in a small bowl. Heat up over a water bath to 105-110F. And if you don’t have a thermometer it should only feel lightly warm to touch.
  8. Add yeast and a dash of ginger to a large bowl. Pour lightly warm sour cream mixture over yeast, cover bowl with a kitchen towel and allow to rest for 7 minutes. The mixture should be bubbly, if it isn’t start again (too cold water won’t activate the yeast and too hot will kill it.)
  9. Mix your flours while the yeast is proofing. Add almond flour, flaxseed meal, whey protein powder, sweetener, xanthan gum, baking powder, and salt to a medium bowl and whisk until thoroughly mixed. Set aside.
  10. Once your yeast is proofed, add int he eggs, lightly cooled melted butter (you don’t want to scramble the eggs or kill the yeast!) and vinegar. Mix with an electric mixer for a minute or so until fully mixed. Add the flour mixture in one go, mixing quickly until thoroughly incorporated. The dough will become very sticky, so you want to work quickly to get it mixed properly. use a wet spatula to gather the dough into a ball.
  11. Divide the dough in 3 so you work in batches, important if you’ve never worked with this dough (you can roll it all in one go after you get some practice!) Lightly oil the piece of cling film and place the dough on top, spreading it with your wet fingertips onto a roughly 7.5×9 ” rectangle. Brush with melted butter and sprinkle with cinnamon sugar to taste, leaving a 1 inch at the top untouched. using the cling film as an aid, roll the dough as tightly as you can and sealing the edge with your wet fingertips. Carefully we the blade of a sharp knife and cut into three if you divided the dough in thirds. Turn the rolls and lightly press them down with your palm.
  12. Transfer the rolls to prepared pan with caramel-pecan topping. Cover with a kitchen towel and place in a warm draft-free space for 50-60 minutes until the dough has almost doubled in size. How long it takes depends on your altitude, temperature and humidity – so keep an eye out for it every 15 minutes or so.
  13. Preheat oven to 400F while the dough is proofing
  14. Place the pan on top of a baking tray and transfer gently into the oven. Bake for 22-30 minutes until deep golden, covering with a loose foil dome as soon as they begin to brown. Just be sure that the foil isn’t resting directly on them. You can do less baking time for gooey-er rolls and longer for more bready ones.
  15. Allow to cool in the pan for 20 minutes and invert onto a serving plate (and ENJOY!)
Recipe Courtesy of Gnom-gnom.com

Crazy keto dough (for everything)

  • Servings: 8
  • Difficulty: easy
  • Print

Think of this as your crazy keto dough good for anything from pizza, hot pockets, tortillas, pasties... and so much more!!!


Ingredients

  • 1 cup almond flour
  • 3 tablespoons coconut flour
  • 2 teaspoons xanthan gum
  • 1 teaspoon baking powder
  • 1/4 teaspoon kosher salt depending on whether sweet or savory
  • 2 teaspoons apple cider vinegar
  • 1 egg lightly beaten
  • 3 teaspoons water as needed

Directions

  1. Add almond flour, coconut flour, xanthan gum, baking powder and salt to food processor. Pulse until thoroughly combined. Note: you can alternatively whisk everything ina large bowl and use a hand or stand mixer for the following steps.
  2. Pour in apple cider vinegar with the food processor running. Once it has distributed evenly, pour in the egg. Followed by the water. Stop the food processor once the dough forms into a ball. The dough will be sticky to touch.
  3. Wrap dough in cling film and knead it through the plastic for a minute or two. Think of it a bit like a stress ball. allow dough to rest for 10 minutes ( and up to 3-4 days in the fridge).
  4. If cooking on the stove top (tortillas, naan)
  5. Heat up a skillet (preferably) or a pan over medium heat. You can test the heat by sprinkling a few water droplets, if the drops evaporate immediately your pan is too hot. The droplets should ‘run’ through the skillet.
  6. Transfer to skillet and cook over medium heat for just 3-4 seconds (very important). Flip it over immediately (using a think spatula or knife), and continue to cook until just lightly golden on each side though with the traditional charred marks), 30 to 40 seconds. The key is not to overcook them, as they will no longer be pliable or puff up.
  7. If baking (pizza, cinnamon rolls)
  8. Preheat oven to 350F. Line a baking tray with a baking mat or parchment paper. If making pizza, you’ll want to blind bake the crust without toppings until lightly golden (10-13 minutes). Add the toppings and bake for an additional 10-15 minutes.
  9. If frying (pasta, ravioli)
  10. Heat up butter or oil in a skillet or pan over low heat. Cook pasta until it just begins to get some color, I found this gave the most ‘al dente’ texture (soft but with a bite). Feel free to make a test with one piece.
Recipe Courtesy of gnom-gnom.com

gluten free & keto bread with yeast

Gluten Free & Keto Bread with Yeast

  • Servings: 12-16 slices
  • Difficulty: easy
  • Print

Light and fluffy and great for grilled cheese


Ingredients

  • 2 teaspoons active dry yeast
  • 2 teaspoons inulin or maple syrup or honey to feed the yeast
  • 1/2 cup water lukewarm between 105-110F
  • 1-3/4 cups almond flour
  • 3/4 cup golden flaxseed meal finely ground
  • 1/4 cup whey protein isolate
  • 2 tablespoons psyllium husk finely ground
  • 2 teaspoons xanthan gum or 4 teaspoons ground flaxseed meal
  • 2 teaspoons baking powder
  • 1 teaspoon kosher salt
  • 1/4 teaspoon cream of tartar
  • 1/8 teaspoon ground ginger
  • 1 egg at room temperature
  • 3 egg whites at room temperature
  • 1/4 cup grass-fed unsalted butter or ghee, melted and cooled
  • 1 tablespoon apple cider vinegar
  • 1/4 cup sour cream

Directions

  1. LIne a 8.5 x 4.5 loaf pan with parchment paper (an absolute must). Set aside.
  2. Add yeast and honey (or any of the sugars above) to a large bowl. heat up water to 105-110F, and if you don’t have a thermometer it should only feel lightly warm to touch. Pour water over yeast mixture, cover bowl with a kitchen towel and allow to rest for 7 minutes. The mixture should be bubbly, if it isn’t start again (too cold water won’t activate the yeast and too hot will kill it.)
  3. Mix your flours while the yeast is proofing. Add almond flour, flaxseed meal, whey protein powder, psyllium husk, xanthan gum, baking powder, salt, cream of tartar and ginger to a medium bowl and whisk until thoroughly mixed. Set aside.
  4. Once your yeast is proofed, add in the egg, egg whites, lightly cooled melted butter (you don’t want to scramble the eggs or kill the yeast!) and vinegar. Mix with an electric mixer for a couple minutes until light and frothy. Add the flour mixture in two batches, alternating with the sour cream, and mixing until thoroughly incorporated. You want to mix thoroughly and quickly to activate the xanthan gum, thought he dough will become thick as the flours absorb the moisture.
  5. Transfer bread dough to prepared loaf pan, using a wet spatula to even out the top. Cover with a kitchen towle and place in a warm draft-free space for 50-60 minutes until the dough has risen just past the top of the loaf pan. How long it takes depends on your altitude, temperature and humidity – so keep an eye out for it every 15 minutes or so. And keep in mind that if you use a larger loaf pan it won’t rise past the top.
  6. Preheat oven to 350F while the dough is proofing. And if you’re baking at high altitude, you’ll want to bake it at 375F.
  7. Place the loaf pan on a baking tray and transfer gently into the oven. Bake for 45-55 minutes until deep golden, covering with a lose foil dome at minute 10-15 (just as it begins to brown). Just be sure that the foil isn’t resting directly on the bread.
  8. Allow the bread to rest in the loaf pan for 5 minutes and transfer it to a cooling rack. Allow to cool completely for best texture – this is an absolute must, as your keto loaf will continue to cook while cooling! Also keep in mind that some slight deflating is normal, don’t sweat it!
  9. Keep stored in an airtight container (or tightly wrapped in cling film) at room temperature for 4-5 days, giving it a light toast before serving. Though you’ll find that this keto bread is surprisingly good even without toasting!
Recipe Courtesy of Gnom-gnom.com

low carb & keto apple crumble

Low Carb & Keto Apple Crumble

  • Servings: 2
  • Print

Crisp, sweet, and you'll never know it's not apples


Ingredients

    For the almond crumble
  • 1/3 cup almond flour
  • 1 tablespoon coconut flour
  • 2-4 tablespoons golden swerve to taste
  • 1/4 teaspoon cinnamon
  • pinch of salt
  • 2 tablespoons grass-fed butter cold and diced
  • 2 tablespoons pecans roughly chopped
  • For the filling
  • 10 ounces chayote squash (or you can use zuchinni) peeled, cored and diced
  • 1-2 tablespoons golden swerve to taste
  • 1/2 teaspoon ground cinnamon
  • 1/4 teaspoon freshly ground nutmeg
  • 1/8 teaspoon ground allspice
  • 1-2 tablespoons lemon juice to taste
  • 1/2-1 teaspoon apple extract to taste
  • 2 tablespoons grass-fed butter

Directions

  1. Preheat oven to 350F. Lightly toast almond flour in a skillet or pan over medium heat, until fully golden and fragrant (2-4 minutes). This is very important taste wise so don’t skip it.
  2. Whisk thoroughly together in a small bowl the toasted almond flour, coconut flour, sweetener, cinnamon and salt. Add in butter and rub the mixture with your fingertips until it resembles coarse bread crumbs. Incorporate pecans and set aside.
  3. Mix together, in a rimmed baking tray or dish, squash, sweetener, cinnamon, nutmeg, allspice and lemon juice (starting with 1 tablespoon, tasting and adding more as needed). Add in apple extract, starting with just 1/2 teaspoon, adding more to taste. You can alternatively cook the filling a bit on the stove-top to nail the flavors.
  4. Top with crumble mixture and bake for 25 to 27 minutes, covering the crumble with foil after 10 minutes to avoid excessive browning.
  5. Allow to cool for at least 15 minutes to allow the flavors to mingle, or store refrigerated for up to 3 days.

Serve for Breakfast or with your favorite Keto Ice Cream as Dessert

The Best 90 Second Keto Bread

The Best 90 Second Keto Bread (Not Eggy)

  • Servings: 3
  • Difficulty: easy
  • Print

Ingredients

  • 1/2 cup almond flour
  • 3 tablespoons golden flaxseed meal
  • 2 tablespoons whey protein isolate
  • 3/4 teaspoons baking powder
  • 1/2 teaspoon xanthan gum
  • 1/4 teaspoon kosher salt
  • 1 egg
  • 2-5 teaspoons erythritol or swerve to taste
  • 1/2 teaspoon apple cider vinegar
  • 2 tablespoons butter melted and cooled
  • 2 tablespoons sour cream or heavy cream
  • Special Equipment
  • microwave-safe mold or ramekin

Directions

  1. Add almond flour, flaxseed meal, whey protein, baking powder, xanthan gum and salt to a medium bowl. Whisk until thoroughly combined, set aside. Note: feel free to make the flour mix ahead in a large batch and simply measure out 1/2 cup + 6 Tablespoons per bread.
  2. Add egg and sweetener to a large bowl and beat with a whisk or electric mixer for 1 minute or two until airy and lighter in color. With the mixer on, add in the apple cider vinegar and butter.
  3. Add in the dry flour mixture in two parts, alternating with the sour cream. Continue to mix for a minutes until fully incorporated and elastic, the batter will thicken as you mix (think almost cookie dough texture).
  4. Transfer the batter to a microwave-safe dish or mold (use either a large one or divided into 3 ramekins), pressing down and smoothing out the top with a wet fingertip.
  5. If you divide the dough in 3 you’ll cook the bread for 90 seconds on high, but if you cook it all together you’ll want to do 150 seconds (2-1/2 minutes). Time can vary a lot in the microwaves, but to give you an idea mine is 1000 watts. Either way, it’ll come out looking pale and spongy (and not very appetizing at all). But worry not, just wait for it to cool down until just lightly warm (it continues to cook as it cools). Then you’ll definitely want to give it a good toast to get some texture on.
  6. Store in an airtight container for 2-3 days or in the freezer for a couple months. Serve warm with a pat of butter.
Recipe Courtesy of gnom-gnom.com